
Kubernetes the not so hard way? Part 1
0 to HA Cluster

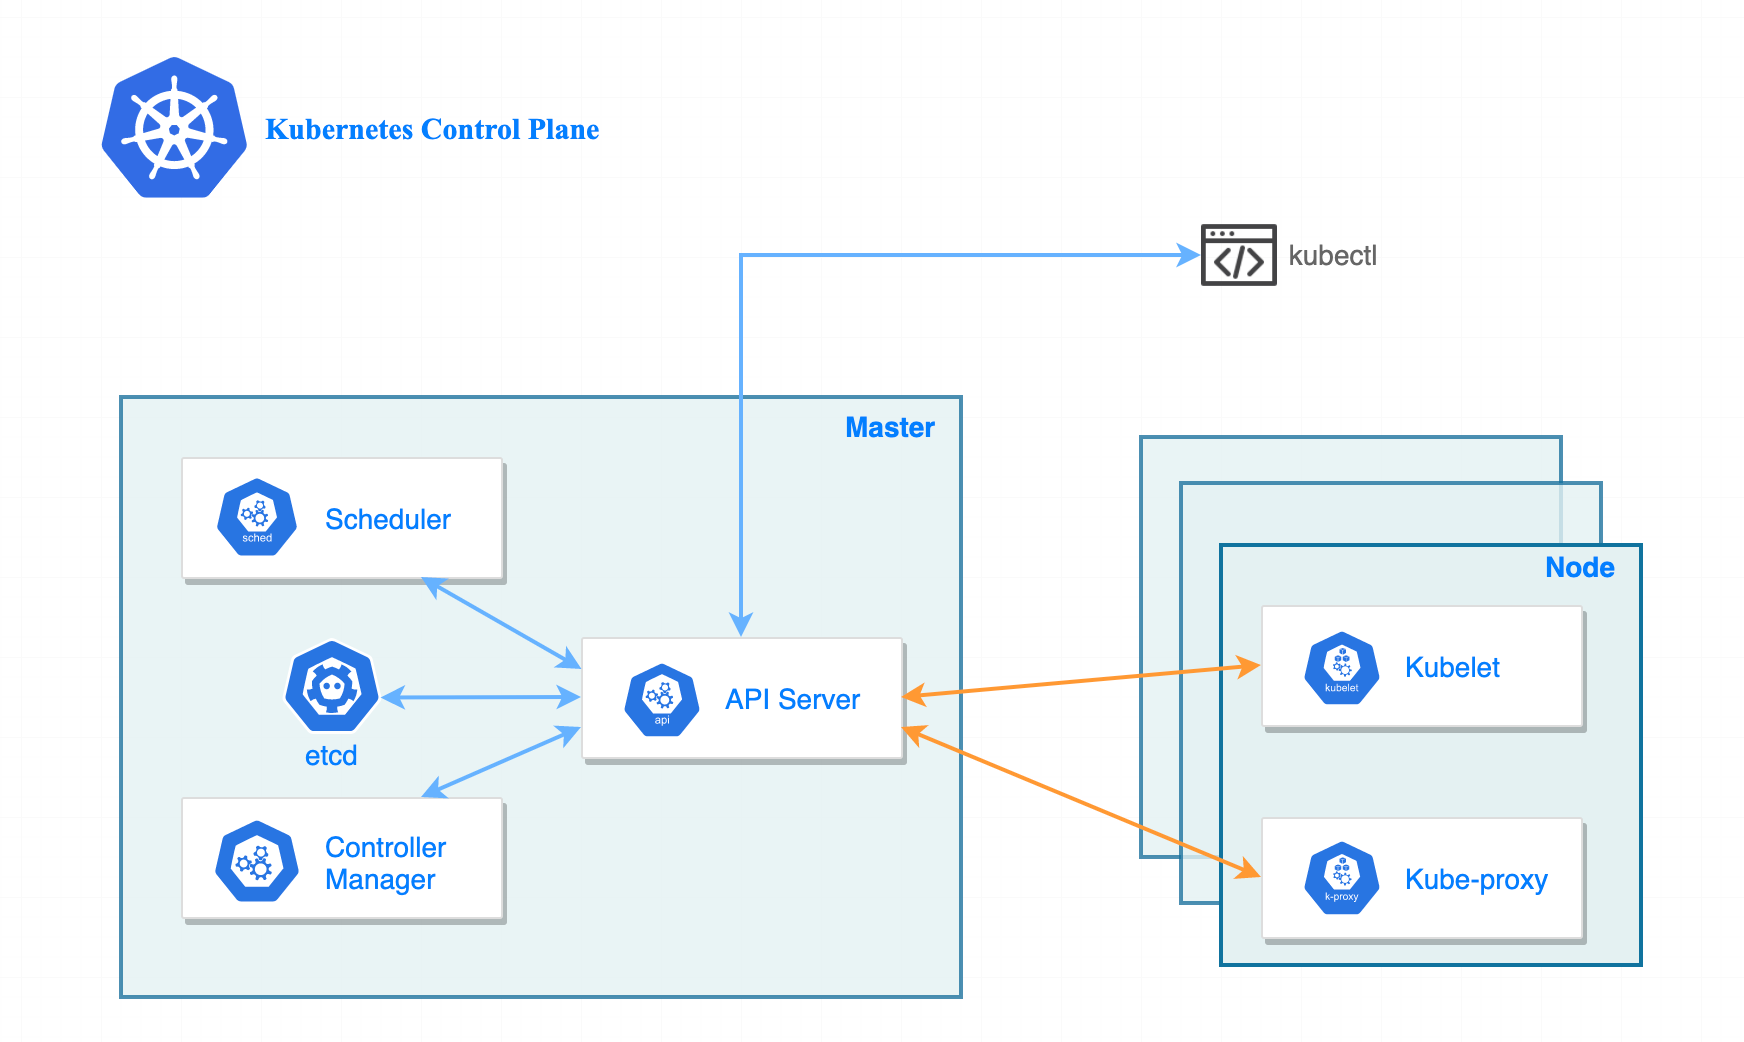
Let’s get straight to it, in this blog we are going to install a high availability (HA) control plane. You may be able to set HA differently than I (VIP or external load balancer), but I will be doing HA via DNS load-balancing, which I will get to later on in this blog.
Cluster Nodes
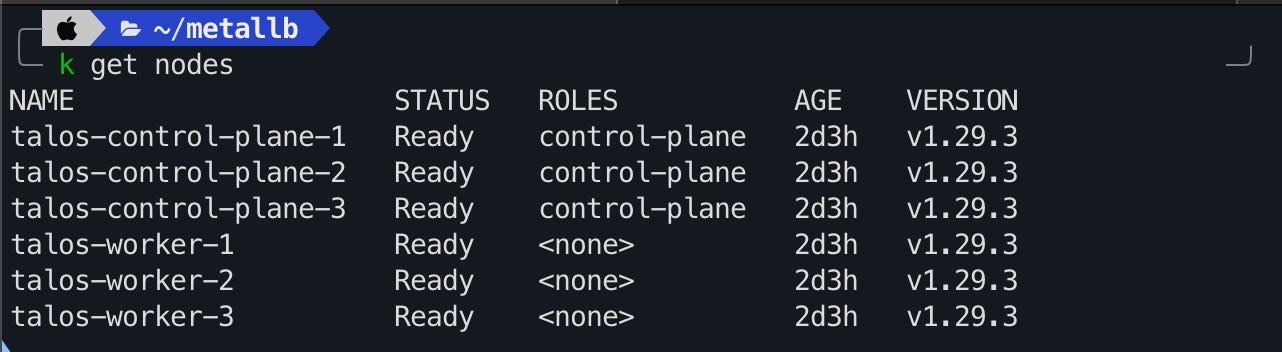
The cluster will be made up of:
3 control plane nodes.
3 worker nodes.
All nodes except one (for resources sake) will be configured with 8GiB of memory and 2 CPUs. The nodes spread evenly across two different hosts in my hypervisor cluster.
I also put the cluster on a different VLAN, just because you’ll have to turn off DHCP, and a few other networking topics that I didn’t want to mess with my main server VLAN. I also don’t want this in the “Untrusted, Internet Access) VLAN because I don’t want issues with accessing the Kubernetes API.
Configuration
Download the Talos Linux ISO
Install Talosctl
curl -sL https://talos.dev/install | shFirst, create a config patch file named mayastor-patch.yaml with the following contents:
- op: add
  path: /machine/sysctls
  value:
    vm.nr_hugepages: "1024"
- op: add
  path: /machine/nodeLabels
  value:
    openebs.io/engine: mayastor
Mayastor will later be used to create persistent storage in Kubernetes.
Using talosctl gen config:
$ talosctl gen config <cluster-name> https://<cluster-endpoint>:6443 --config-patch @mayastor-patch.yaml

generating PKI and tokens
created /Users/taloswork/controlplane.yaml
created /Users/taloswork/worker.yaml
created /Users/taloswork/talosconfig
This will generate three configuration files that will be applied to your nodes.
Make sure to specify a URL as this will be added as a DNS record on your local DNS server. You will have to use an IP address if you have no local DNS server. If you do not use a virtual IP this defeats the purpose of a high availability control plane. If the node in your kubeconfig goes down you will have to manually change it to a different node or be SOL, your choice.
Anyway, I’m here to help with the real configuration and not something that is specified in the Talos documentation. So while you work on getting your cluster stood up, start from here, and follow the rest of the docs.
Access the Kubernetes API
As I said earlier, I am doing DNS load balancing to the control plane nodes in my configuration.
DNS-based load balancing is a specific type of load balancing that uses the DNS to distribute traffic across several servers. It does this by providing different IP addresses in response to DNS queries.
In round-robin DNS, domains have multiple A records, each tied to a different IP address. As DNS queries come in, IP addresses rotate in a round-robin fashion, spreading the requests across the associated servers.
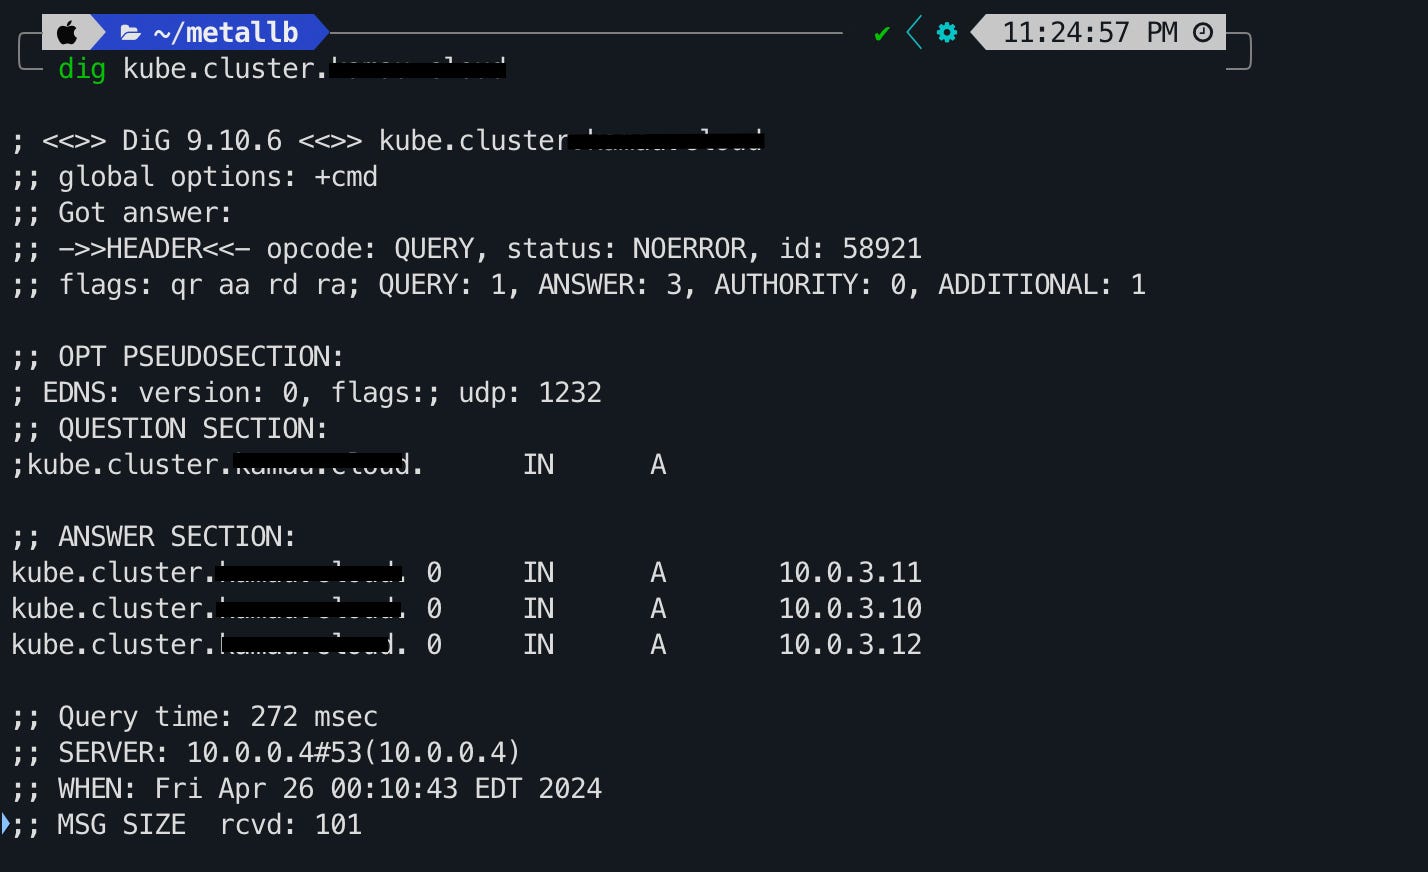
If you run your own PiHole or any other local DNS server at home, you can create multiple A records to the static IPs of your control plane nodes. In the event a node goes down, your cluster can still be accessed.
Metallb
Kubernetes does not offer an implementation of network load balancers (Services of type LoadBalancer) for bare-metal clusters. The implementations of network load balancers that Kubernetes does ship with are all glue code that calls out to various IaaS platforms (GCP, AWS, Azure…). If you’re not running on a supported IaaS platform (GCP, AWS, Azure…), LoadBalancers will remain in the “pending” state indefinitely when created.
Bare-metal cluster operators are left with two lesser tools to bring user traffic into their clusters, “NodePort” and “externalIPs” services. Both of these options have significant downsides for production use, which makes bare-metal clusters second-class citizens in the Kubernetes ecosystem.
MetalLB aims to redress this imbalance by offering a network load balancer implementation that integrates with standard network equipment, so that external services on bare-metal clusters also “just work” as much as possible.
Metallb sums it up a lot better than I can, but with all of that said, if you have ever tried to stand up on on-prem Kubernetes without a Metallb or KubeVIP then you have experienced probably experience having to access your test NGINX application at 10.0.0.9:36677, or your service of type LoadBalancer stuck in the <pending> state. Metallb solves this problem.
The installation of Metallb is simple as well, just make sure you have a pool of unused IP addresses in your subnet and DHCP turned off.
kubectl apply -f https://raw.githubusercontent.com/metallb/metallb/v0.14.5/config/manifests/metallb-native.yamlThis will create the metallb-system namespace, custom resource definitions, and a bunch of resources inside it.
Next, you want to apply to create and apply the address pool you have:
apiVersion: metallb.io/v1beta1
kind: IPAddressPool
metadata:
  name: first-pool
  namespace: metallb-system
spec:
  addresses:
  - 10.0.3.50-10.0.3.120
kubectl apply -f metal-pool.yamlLastly, create the Layer 2 advertisement. In layer 2 mode, one node assumes the responsibility of advertising a service to the local network. From the network’s perspective, it simply looks like that machine has multiple IP addresses assigned to its network interface.
apiVersion: metallb.io/v1beta1
kind: L2Advertisement
metadata:
name: kf-k8s-l2-adv
namespace: metallb-system
spec:
ipAddressPools:
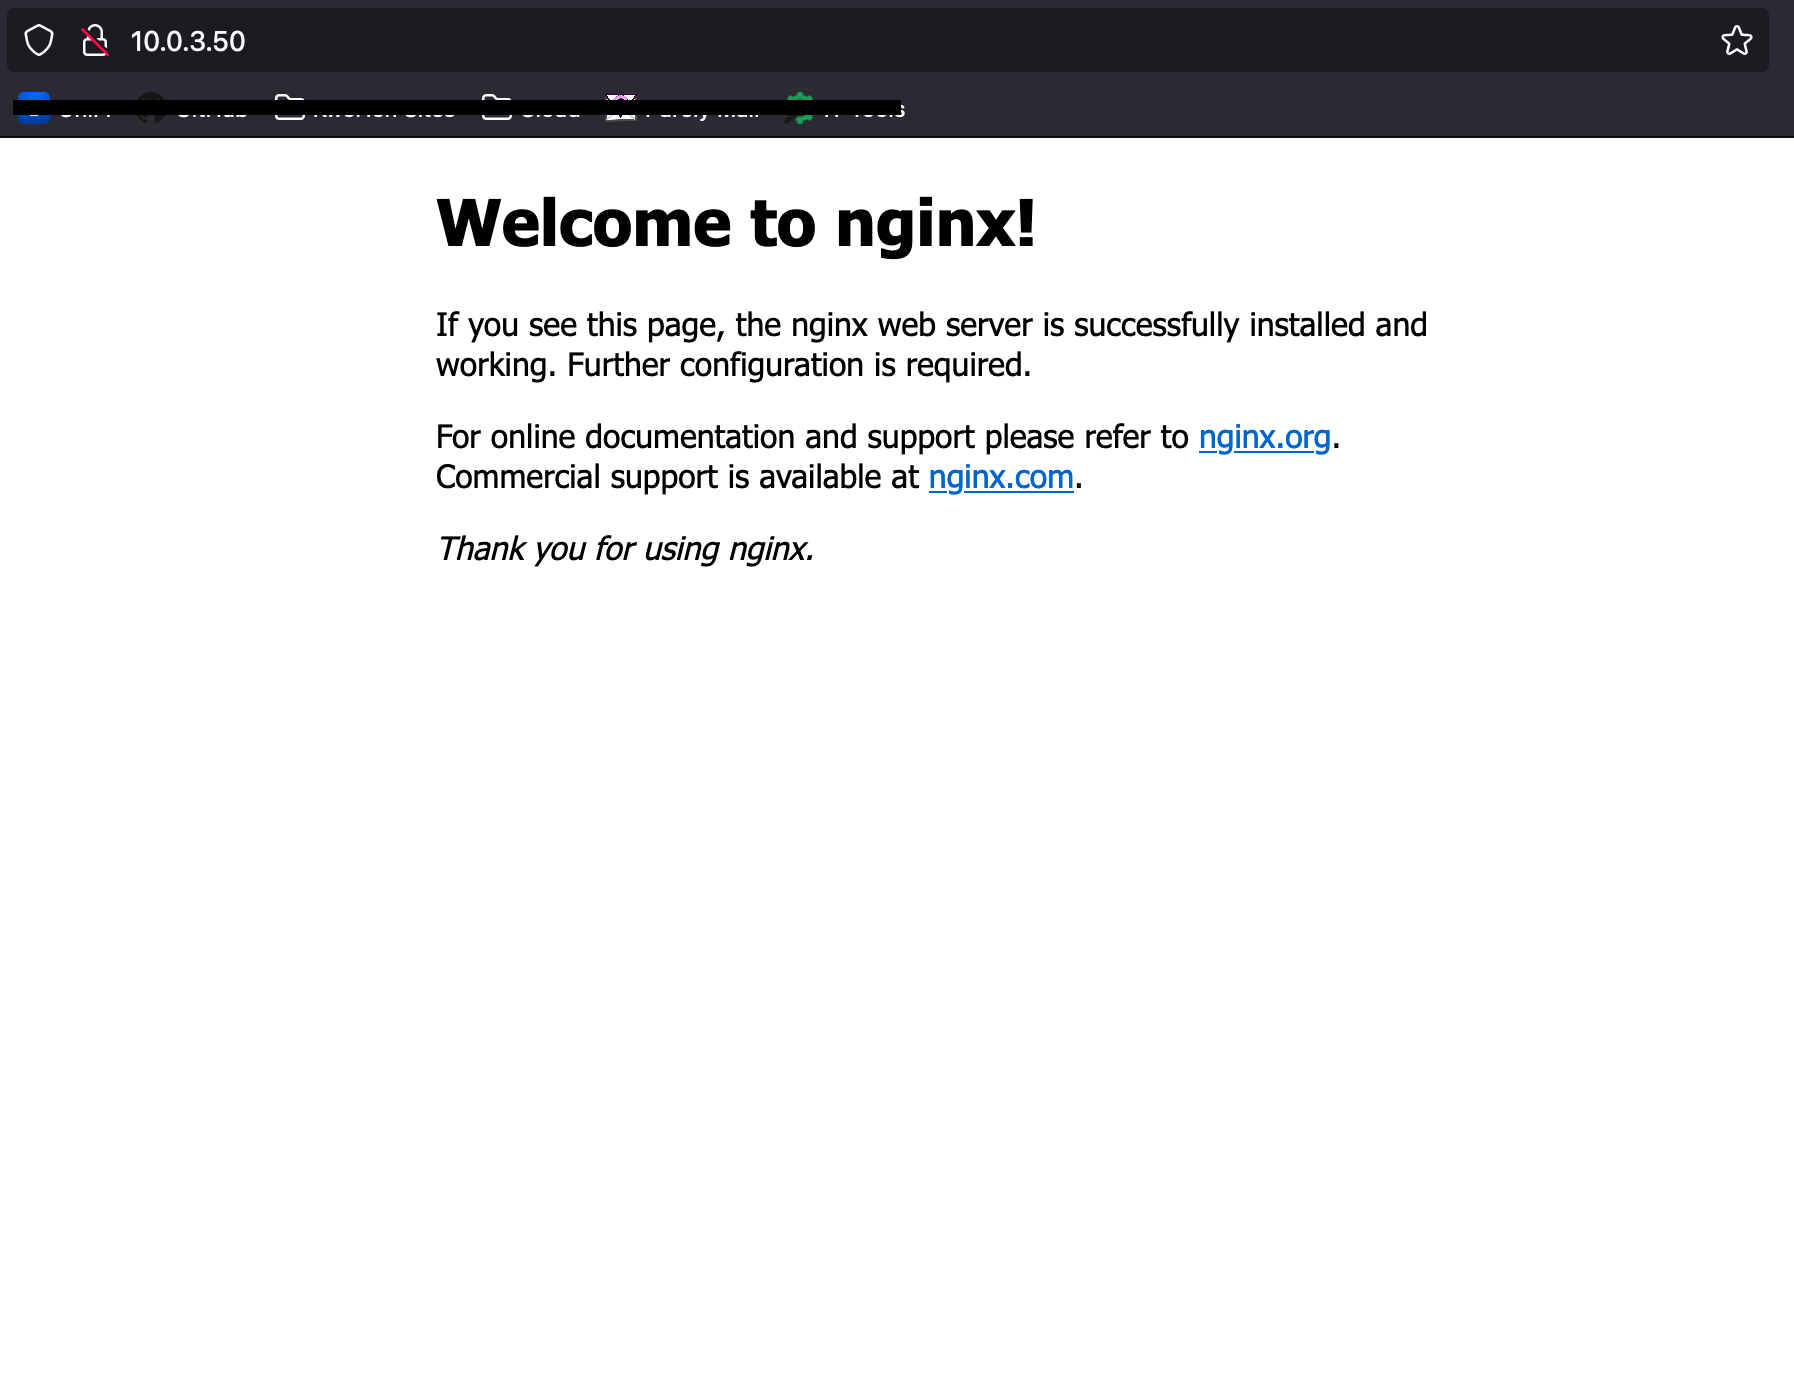
- first-poolkubectl apply -f metal-adv.yamlYou can test Metallb is working by creating and exposing a deployment and then ensuring it is assigned an IP address from your pool.
kubectl create deploy nginx --image nginx:latest
kubectl expose deploy nginx --port 80 --type LoadBalancer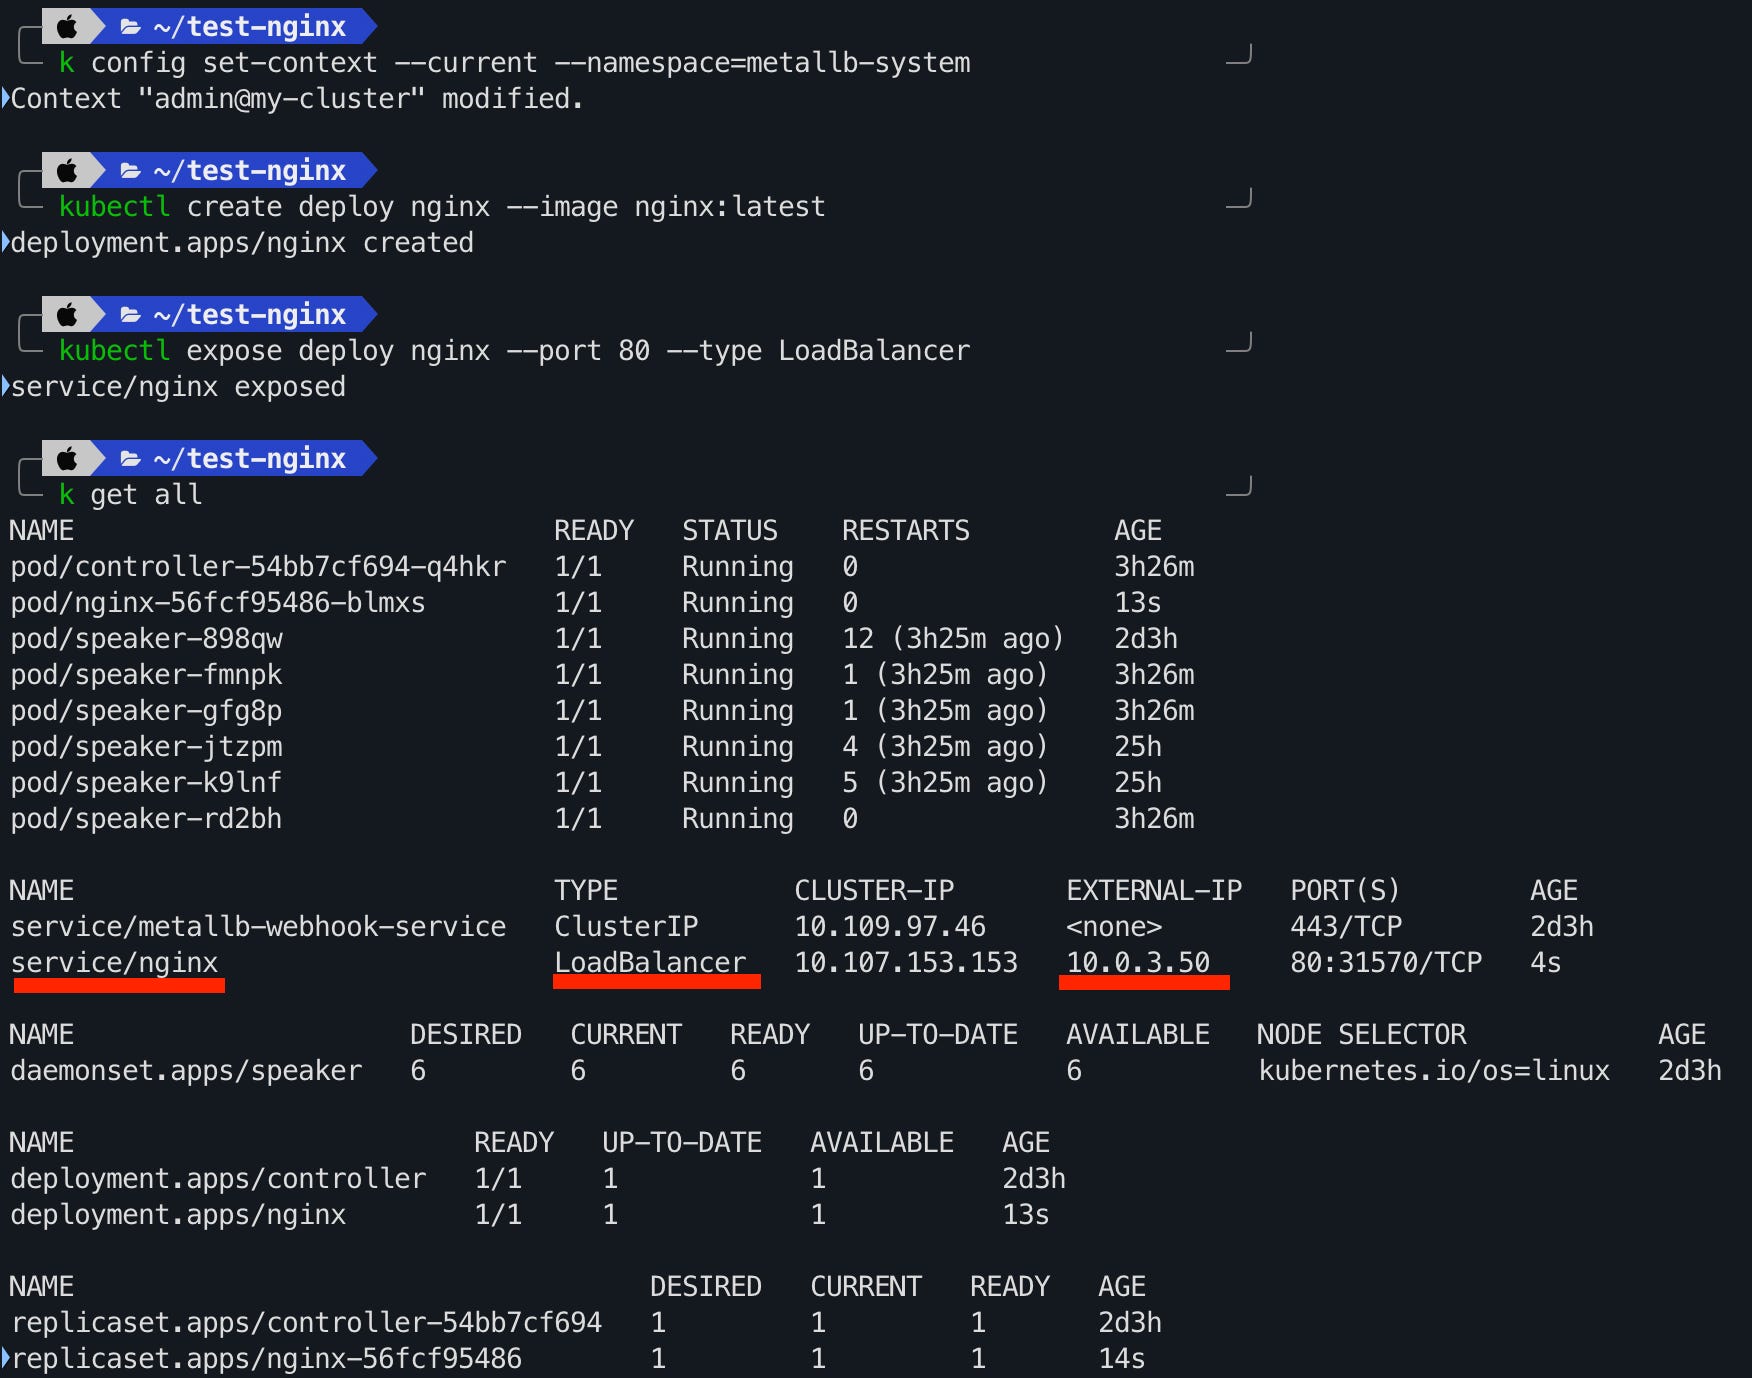
Onto persistent storage…